
Desserts
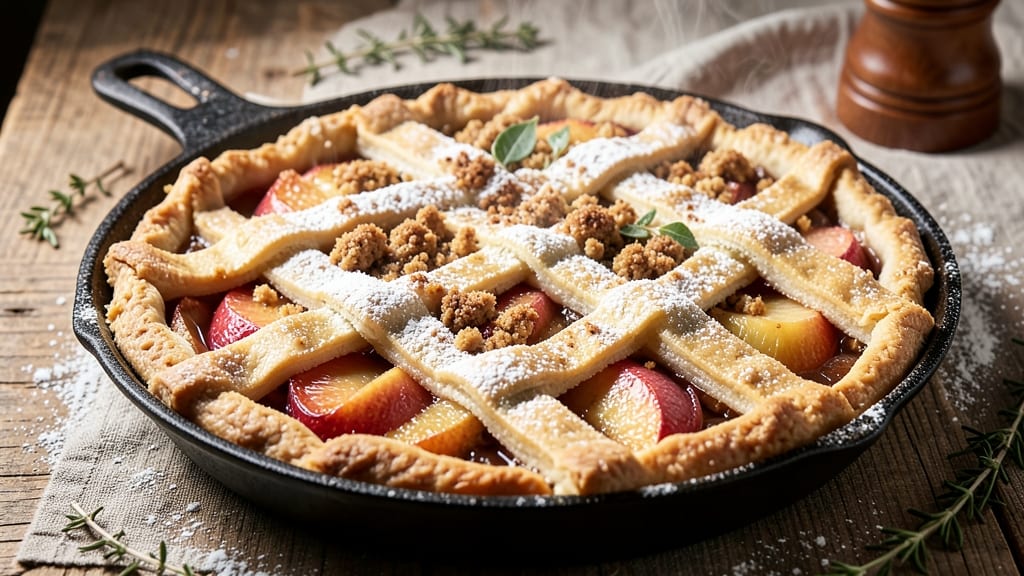
This apple pan pie recipe transforms a classic dessert into a comforting one-dish wonder that bridges dinner and dessert effortlessly. 🌟 The secret lies in a perfectly spiced apple filling—tender, caramelized slices that release their juices just enough to create a luscious, bubbling center—all nestled in a golden, flaky crust that holds up beautifully.
Whether you use a store-bought shortcut or roll out your own homemade dough, the results are equally impressive, with that signature rustic charm that makes every bite feel like a warm hug.
The magic happens during the baking process, where the apples soften just enough to release their natural sweetness while maintaining a slight bite. A sprinkle of cinnamon sugar on top adds texture and aroma, while a simple caramel drizzle ties everything together with a glossy finish.
This recipe is designed to be foolproof, with clear steps for prepping the apples, building the crust, and testing for doneness—no guesswork, just reliable results every time. The best part?
It’s versatile enough to serve with vanilla ice cream for a decadent treat or as a standalone dessert that feels special enough for company.
What sets this apple pan pie apart is its ability to adapt to any occasion—rustic enough for a family gathering, elegant enough for a dinner party, and simple enough for a weeknight dessert.
The filling can be customized with a splash of bourbon or lemon zest for depth, or you can even try a lattice crust for a more sophisticated touch.
The crust itself is sturdy enough to hold its shape while still being tender enough to melt in your mouth, making it the perfect balance of structure and indulgence.
Once you’ve mastered this recipe, you’ll find yourself reaching for apples in season to create this comforting classic again and again.
The aroma of cinnamon and apples baking in the oven is enough to turn any kitchen into a cozy haven, and the first forkful—warm, spiced, and perfectly balanced—is what keeps everyone coming back for more.
Let’s get started on creating a pie that’s as much about nostalgia as it is about deliciousness.
Ingredients for apple pan pie
Six apples, one crust, endless comfort—this pie is your new go-to for any occasion.
| Ingredient | Amount | Notes |
|---|---|---|
| Apples (Mixed Varieties) 🍎 | 6 medium | Honeycrisp, Granny Smith, or Gala |
| All-Purpose Flour 🌾 | 2 ½ cups | For sturdy crust, spooned & leveled |
| Unsalted Butter 🧈 | 1 cup | Cold, cubed for flaky crust |
| Granulated Sugar 🍚 | 1 ½ cups | Plus extra for sprinkling |
| Brown Sugar 🍚 | ½ cup | Packed for caramel depth |
| Ground Cinnamon 🌿 | 2 tbsp | Freshly ground preferred |
| Ground Nutmeg 🌿 | ½ tsp | Freshly grated for warmth |
| Salt 🧂 | 1 tsp | Fine sea salt preferred |
| Vanilla Extract 🥛 | 1 tsp | Pure extract, not imitation |
| Lemon Juice 🍋 | 1 tbsp | Freshly squeezed |
| Ice Water 💧 | ½ cup | For dough handling |
| Heavy Cream 🥛 | ½ cup | For caramel drizzle |
| Honey 🍯 | 2 tbsp | For caramel finish |
The apples make or break this. Mixed varieties give you both sweetness and tartness—Honeycrisp for juiciness, Granny Smith for bite. Grab them at Trader Joe's or your local farmers market when they're in season. Look for firm, vibrant fruit—no bruises, please. The crust? All-purpose flour is your friend here, but if you want extra flakiness, swap in half whole wheat. Keep everything cold until ready to use—cold butter is non-negotiable for that perfect flaky layer. And if you're feeling fancy, Pillsbury's pie crust works in a pinch, but homemade tastes like love.
No cinnamon? Cardamom at half the amount adds a different warmth. Short on butter? Coconut oil works, though it'll have a slightly different texture. The apples can be prepped ahead—peel and slice them, then toss with lemon juice to keep them fresh. Store-bought caramel sauce is fine if you're in a hurry, but homemade with honey and cream? Worth the extra 5 minutes. For the crust, if you don't have ice water, chilled vodka works too—it keeps the dough from getting tough. And if you're making this ahead, bake it day-of—the crust gets soggy if pre-baked too early.
This pie tastes even better the next day—honestly, 3-4 days in the fridge is ideal. Store it in an airtight container with parchment between layers if stacking. For freezing, wrap tightly in foil and it'll keep for up to 3 months. Reheat at 350°F for 15 minutes to restore that fresh-baked magic. And if you've got leftovers? Toast the crust for a crispy breakfast pie the next morning—trust me on that.
Why You'll Love This Recipe
- No Puff Pastry Needed: I’ll admit, I used to avoid pie crusts—flaky perfection is hard to nail. But this recipe skips the fuss entirely. A simple flour-butter mix pressed into the pan creates a tender, golden crust that’s foolproof and actually tasty. Honestly, it’s the kind of shortcut that makes me feel clever.
- Caramelized Edge Magic: That crispy, buttery crust meeting the soft-spiced apples? It’s what dreams are made of. The brown sugar in the filling melts into a glossy, sticky layer, while the granulated sugar keeps it bright. (Yes, even on a Tuesday night, this tastes like a bakery treat.)
- Weeknight Meal Prep Hero: Between us, this is my go-to for busy mornings. Bake a big pan pie on Sunday, slice it up, and you’ve got breakfast, lunch, or a snack covered. The apples hold up beautifully—no soggy mess here. My daughter picks out the crispest pieces first, but still asks for seconds.
- Pantry Staple Power: I keep all the ingredients on hand: flour, butter, sugar, and whatever apples are on sale. No specialty items, no last-minute grocery runs. And the leftovers? They reheat like a charm—just pop slices in the oven until warm. Solid, reliable, and my secret weapon for lazy days.
Step-by-step instructions for apple pan pie
Here's how to build this showstopper—crisp crust, spiced apples, and a caramel drizzle that'll have everyone begging for seconds.
👨🍳 Step 1: Make the Perfect Crust
In a large bowl, combine the 2.5 cups all-purpose flour and 1 tsp salt. Cut in the 1 cup cold, cubed unsalted butter using a pastry cutter or your fingers until the mixture resembles coarse crumbs with pea-sized butter pieces. This texture is key—it creates flaky layers when baked.
Drizzle in the 0.5 cup ice water one tablespoon at a time while gently stirring with a fork. Stop mixing as soon as the dough comes together—overworking develops gluten and makes the crust tough. Form two discs, wrap in plastic, and chill for at least 1 hour (or up to 2 days). The cold dough handles better and gives you that signature flaky texture.
🍎 Step 2: Prepare the Apple Filling
Peel, core, and slice the 6 medium apples into ¼-inch thick slices. Toss them with 1.5 cups granulated sugar, 0.5 cup brown sugar, 2 tbsp ground cinnamon, 0.5 tsp ground nutmeg, 1 tsp vanilla extract, and 1 tbsp lemon juice in a large bowl. The lemon juice brightens the apples while the spices deepen their flavor. Let the mixture sit for 10 minutes—this allows the juices to release and the spices to bloom.
Here's the thing—don't skip the lemon juice. It prevents the apples from turning mushy and adds a subtle tang that balances all that sweetness. I like to use a mix of crisp apples like Honeycrisp and tart ones like Granny Smith for the perfect texture contrast.
🍳 Step 3: Assemble the Pie
Preheat your oven to 375°F. Roll out one chilled dough disc to fit your 9-inch pie pan, leaving a 1-inch overhang on all sides. Gently press it into the pan, then trim the excess. Roll out the second disc and cut into ½-inch wide strips for the lattice top.
Arrange the apple slices in the bottom crust in a single layer, slightly overlapping them. Pour in any accumulated juices from the bowl. This ensures your pie stays moist during baking. Here's where it gets fun—lattice tops look impressive but allow heat to circulate, giving you crisp edges and tender fruit.
🔥 Step 4: Bake to Golden Perfection
Arrange the dough strips in a lattice pattern over the apples, weaving them together like a basket. Brush the top with a mixture of 0.5 cup heavy cream and 2 tbsp honey, then sprinkle with a little extra granulated sugar for caramelization. Bake for 45-50 minutes until the crust is deep golden brown and the filling is bubbling.
Don't open the oven during baking—resist the temptation! The steam needs to build up to create that perfect texture. You'll know it's done when the crust is crisp and the apples are tender but still hold their shape. Let it cool for at least 2 hours before slicing—this resting time lets the juices set and makes serving easier.
🍽️ Step 5: Serve Warm with Vanilla Ice Cream
Slice the pie into 6 generous wedges (remember, this serves 6!). The caramel drizzle should be slightly thickened but still glossy. Serve warm with a scoop of vanilla ice cream—the contrast of hot and cold makes this dessert-to-dinner pie even more magical.
Real talk: This pie tastes even better the next day when the flavors have melded together. Store leftovers covered at room temperature for up to 3 days, or refrigerate for up to 5 days. The crust stays crisp, and the apples develop even more depth of flavor over time.
Pro Tips For Making Apple Pan Pie
- Preheat Pan, Not Oven: I learned this the hard way—skipping this step means your crust will fight you the whole time. Get that pan scorchingly hot (425°F) for 10 minutes before adding the apples, so the butter sizzles and caramelizes instantly instead of steaming like sad oatmeal.
- Toss Apples with Brown Sugar: Don’t just dump sugar on top—mix it into the sliced apples with a spoon. The brown sugar needs to cling to the fruit while it cooks, not just melt into a puddle at the bottom. (Yes, even if you’re impatient like me.)
- Skip the Overmixing: Your crust dough will fight back if you knead it like you’re punishing it. Handle it just until it comes together—overworking it makes it tough, and nobody wants a pie with a texture like a hockey puck.
- Use Cold Butter in Crust: Cut that butter into the flour fast and keep it cold—no need to soften it first. Cold butter creates flaky layers, while warm butter just turns into a greasy mess. (Trust me, I’ve made both.)
Dietary considerations for these flavors
Gluten-Free Adaptation
For a gluten-free version, swap the all-purpose flour crust for a 1:1 gluten-free flour blend like King Arthur Measure for Measure or Bob's Red Mill 1-to-1.
Add ½ tsp xanthan gum to help bind the dough, and increase the ice water by 1 tbsp—gluten-free doughs tend to be drier. Chill the dough for 2 extra hours to prevent shrinking during baking. 🌾
Dairy-Free Options
Replace the 1 cup unsalted butter in the crust with 1 cup dairy-free butter like Miyoko's or Earth Balance. For the caramel drizzle, use ½ cup coconut cream instead of heavy cream—it adds richness without dairy. The flavor stays just as luscious, and the texture remains glossy. 🥛
Lower-Sugar Version
Cut the sugar by ⅓—use 1 cup granulated sugar and ⅓ cup brown sugar instead of the full amounts. Boost the flavor with 1 extra tbsp cinnamon and ½ tsp vanilla bean paste (stronger than extract). The apples will still caramelize beautifully, just with a more balanced sweetness. 🍎
Nut-Free Kitchen
This recipe is naturally nut-free, but always double-check your granulated sugar and cinnamon for cross-contamination warnings. Use a separate toaster or toaster oven if sharing kitchen space with nut products. The filling and crust ingredients are inherently safe for nut allergies. 🌟
Vegan-Friendly Twist
For a vegan crust, use 1 cup vegan butter (like Earth Balance) and 1 tbsp flaxseed meal mixed with 3 tbsp water as an egg substitute. The caramel drizzle becomes ½ cup coconut cream + 2 tbsp maple syrup. The pie stays crisp, flavorful, and completely plant-based. 🌱
Nutrition facts
Frequently asked questions
Can I use frozen apples instead of fresh?
Frozen apples work in a pinch, but they release more water during baking, which can make the crust soggy. If using frozen, thaw them first and pat them completely dry with paper towels. You may need to reduce the sugar slightly since frozen apples tend to be sweeter. For best results, stick with fresh apples in season.
How do I prevent the crust from getting soggy?
Prevent soggy crust by creating a "moat" of dried breadcrumbs or crushed cookies between the bottom crust and filling. This barrier absorbs excess moisture from the apples. Also, avoid overfilling the pie—leave about ½-inch of space between the filling and the top crust to allow for expansion.
What's the best way to reheat leftover apple pie?
For the best results, reheat slices at 350°F for 10-15 minutes, covered loosely with foil. This restores the crust's crispness without drying out the apples. Microwaving works in a pinch (30 seconds), but it won't give you that fresh-baked texture. The pie actually tastes better reheated than cold!
Can I make this pie ahead of time?
Assemble the pie (unbaked) up to 24 hours ahead and refrigerate. When ready to bake, let it sit at room temperature for 30 minutes before baking as directed. For a make-ahead dessert, this is perfect—just bake when guests arrive for that warm-from-the-oven appeal.
What's the secret to a perfect lattice crust?
For a clean lattice, roll out the second dough disc and cut it into ½-inch strips using a sharp knife or pizza cutter. Weave the strips in a basketweave pattern, leaving ¼-inch gaps between them. Brush the strips lightly with water before weaving to help them stick together. The gaps allow heat to circulate while keeping the filling moist.